
The Function Booking workflow is designed to streamline bookings for private functions, corporate events, or any off-platform events. Follow these steps to create and manage a booking efficiently.
Step 1: Create a New Booking
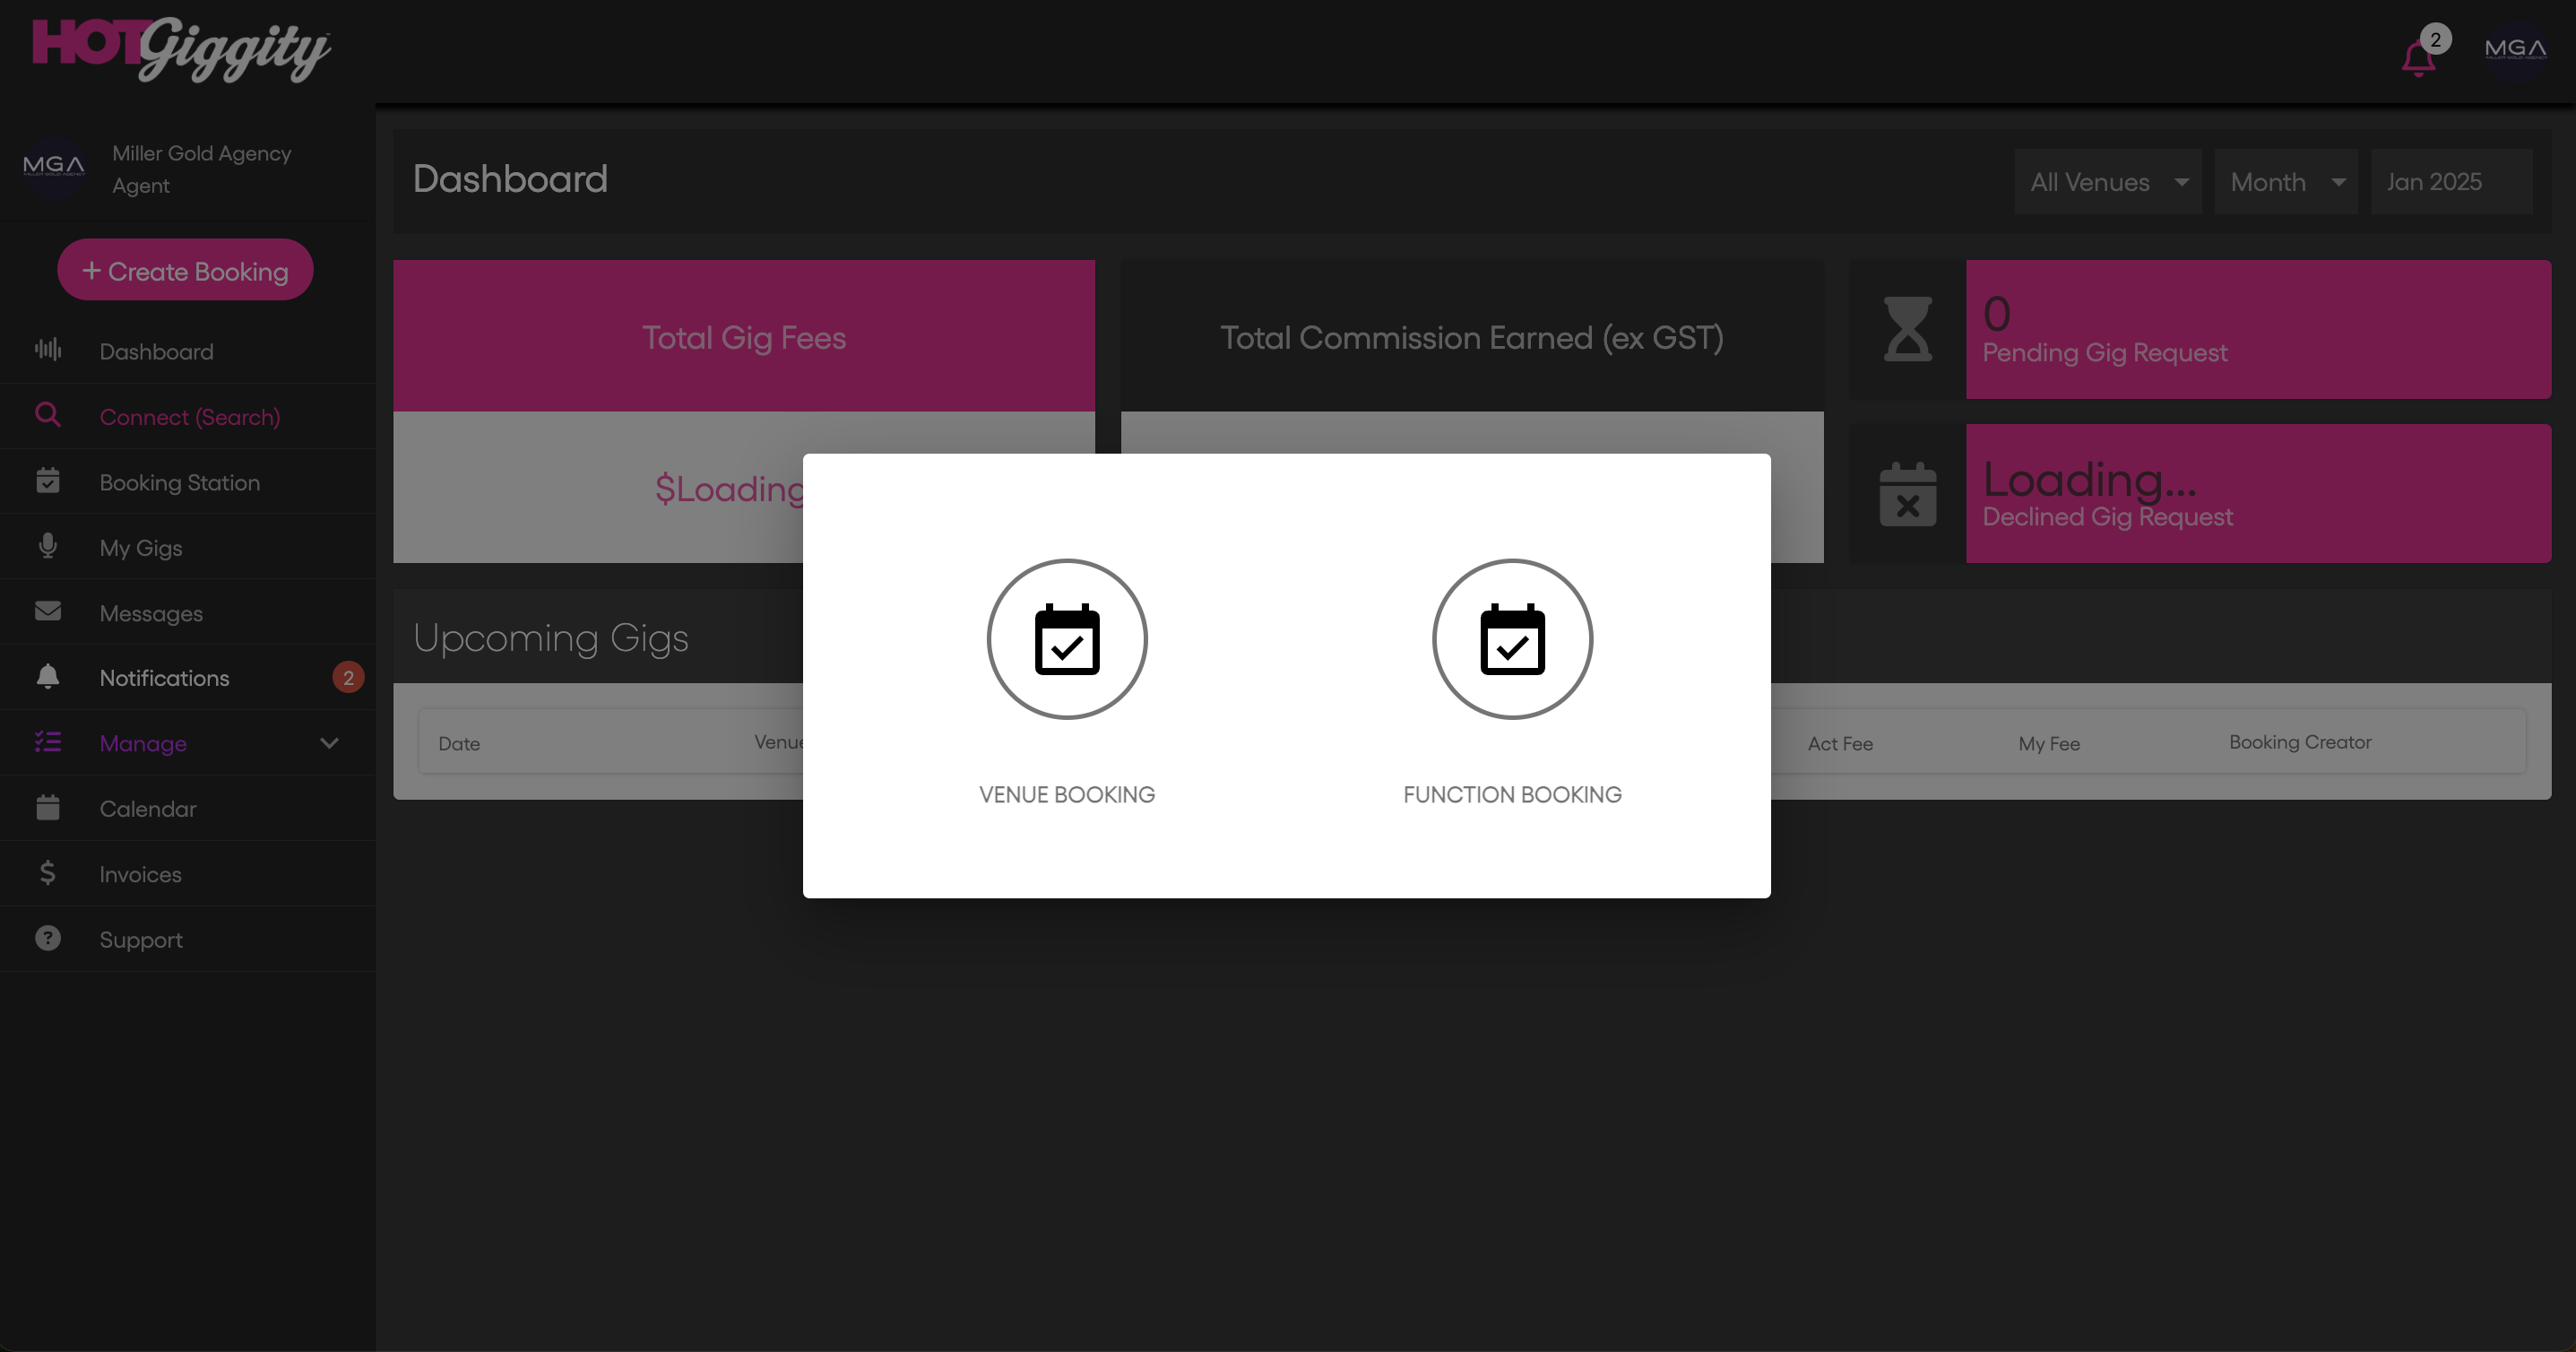
- Click the Create Booking button in the top left corner of the dashboard.
- Select Function Booking from the available booking types.
Step 2: Complete the Booking Sheet
Ensure all required details are entered accurately, particularly the client’s email address, as it is used for invoicing and client notifications.
Date and Time Details
- Manually enter the date, start and end times, load-in, and soundcheck times.
Client Details
- Input all client information, including:
- Company / Client Name
- Contact First & Last Name
- Address, Phone, and Email (Email is required for sending the booking to your client)
Event / Venue Details
- Enter the Event Title (this appears in the invoice line item description).
- Input venue details, including:
- Venue Name
- Venue Contact Information (Address, Phone, Email)
- If applicable, enter the Ticket URL (for ticketed events, this creates a link on the venue’s profile page).
Act Details
- Select the act performing at the event. Only acts available for the specified date and time will be displayed.
- Act Type
- Lineup Numbers
- Select Act
- Choose whether to display the gig in your public profile.
Fee & Deposit Details
- Enter the financial details, including:
- Gig Fee to Client
- Agent Commission (percentage or fixed amount)
- Gig Fee Paid to Act
- Deposit Amount & Due Date
- Balance Due & Due Date
- Optionally, generate an invoice for the booking by clicking Create Invoice.
Gig Requirements
- Provide the artist with necessary event details, such as:
- Number of Sets
- Suggested Genres & Vibes
- Dress Code
- Production Requirements (Can be saved as a template for future use.)
- Add Act Notes (e.g., dB limits, parking instructions) and Internal Notes (not visible to the act or client).
Contracts
- Upload or generate a Client Contract (linked to Terms & Conditions).
- The event name defaults to "Act Name @ Venue Name", but this can be edited.
Step 3: Save & Review Booking
- Click Save/Next at the bottom right.
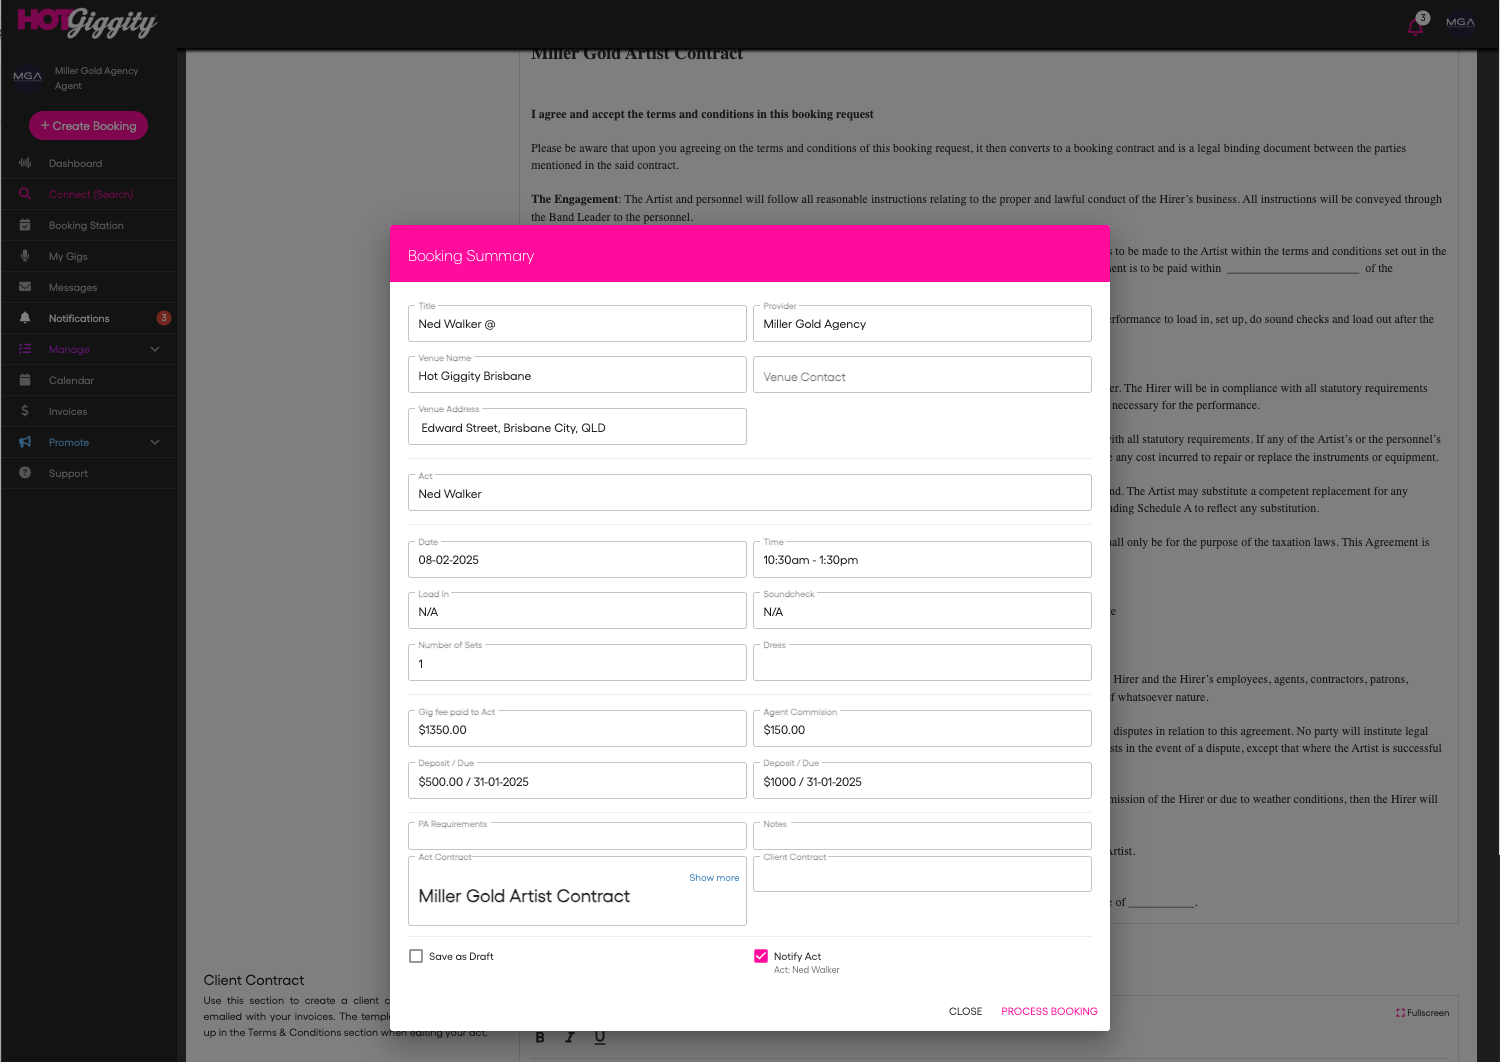
- Review the Booking Summary.
- Save as Draft (if details are still being finalised).
- Click Notify Act to send details to the act (status updates to Sent to Act, shown in Dark Blue).
Step 4: Process Booking & Notify Client
- Click Process Booking.
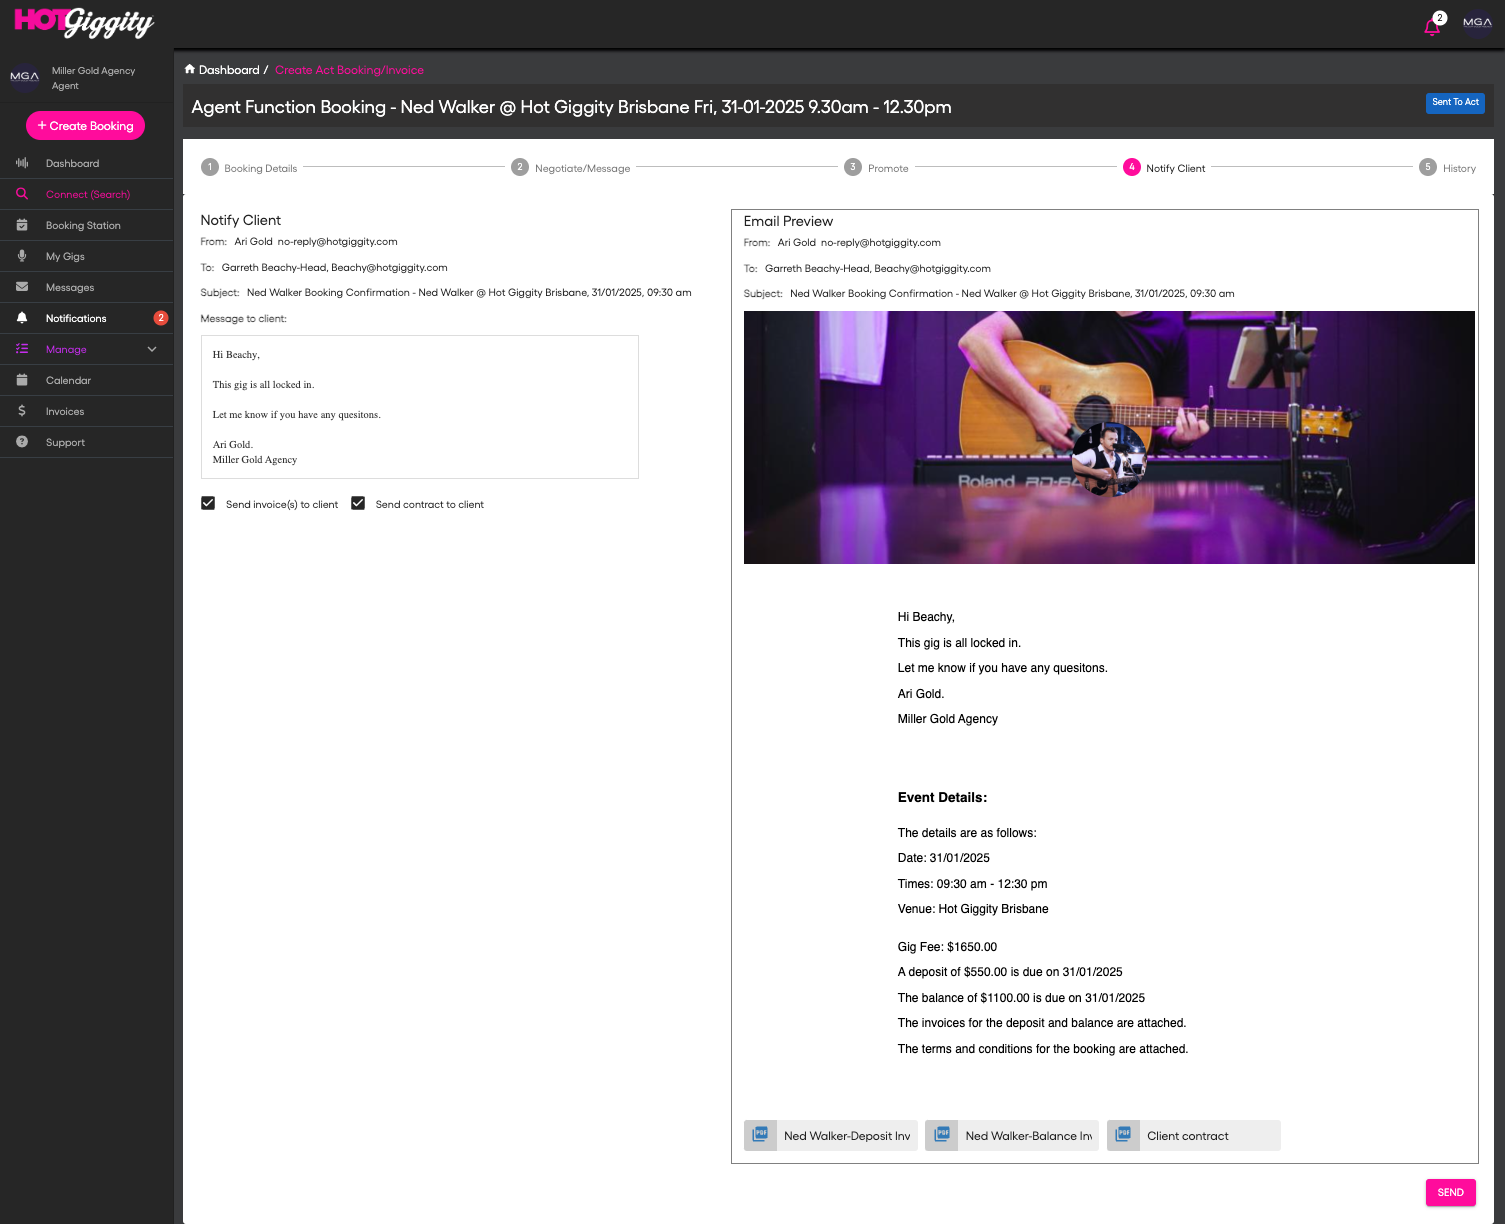
- Notify the client by sending an email with event details, including:
- Deposit & balance invoices
- Contract
- Custom message
- Click Send – the gig status updates to Client Notified.
Step 5: Act Confirmation & Finalisation
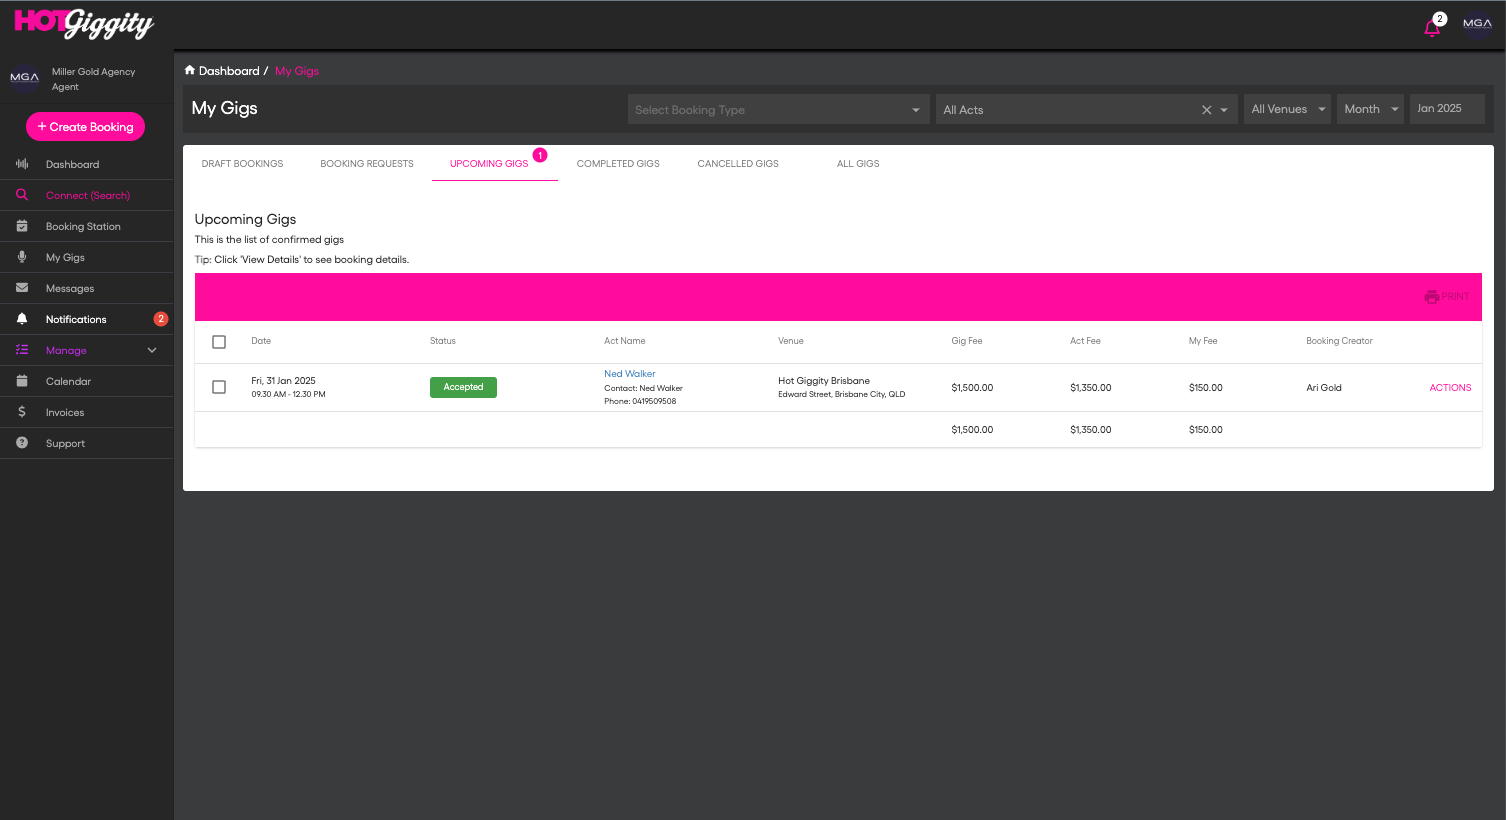
- Once the act accepts the booking, you will receive an in-app notification.
- The booking status updates to Accepted and appears in Upcoming Bookings for that month.
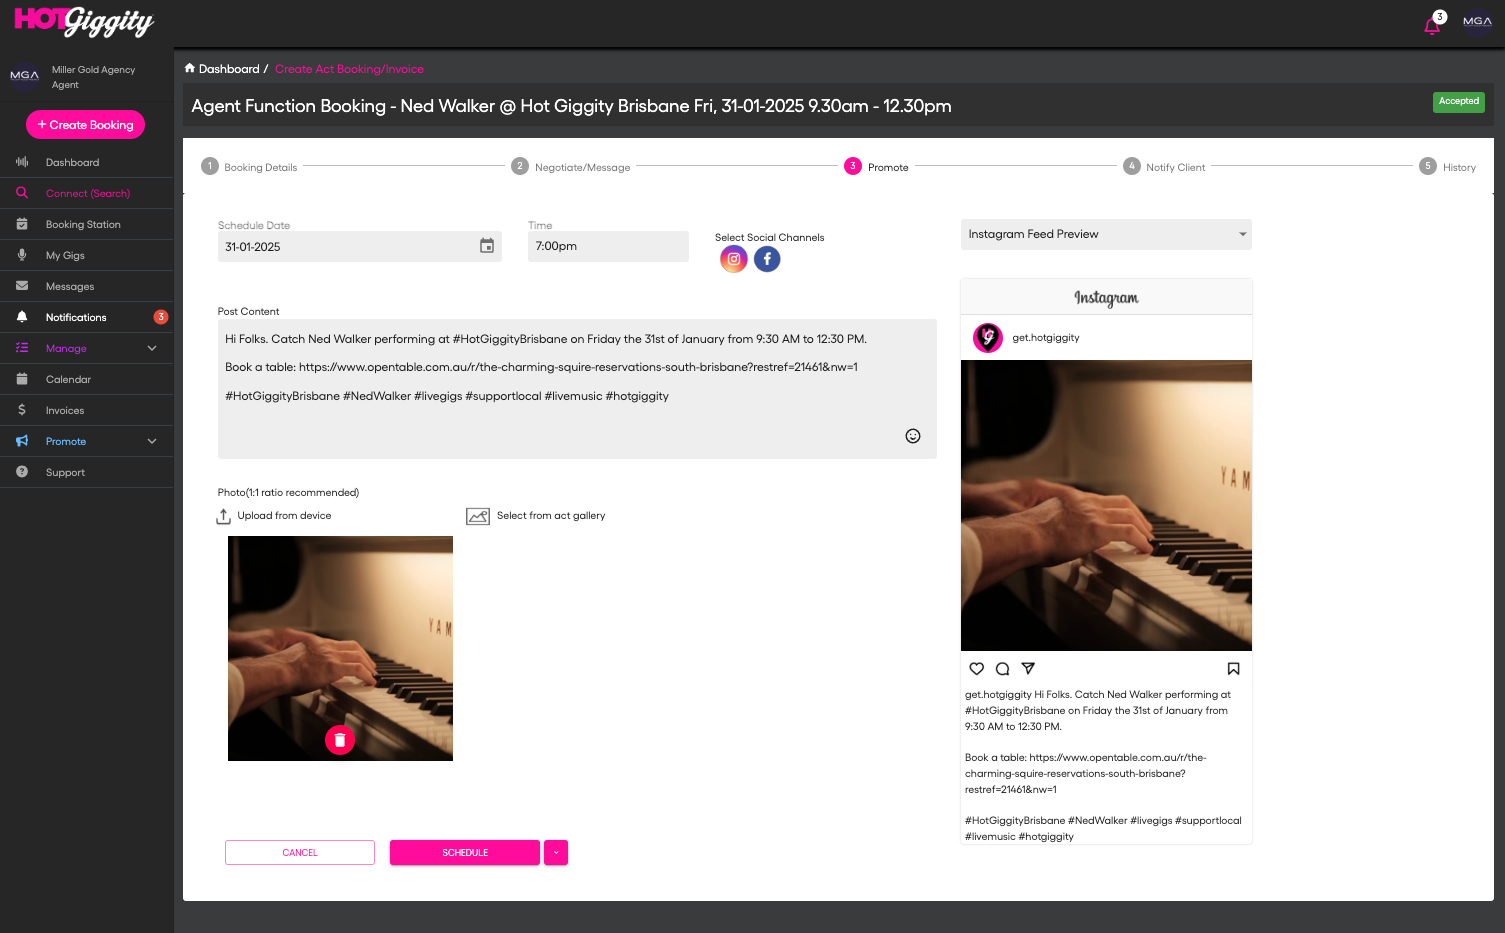
Step 6: Promote the Gig on Facebook and Instagram (if applicable)
- Use the Promote tab within the booking workflow to create and schedule social media posts.
- Select Facebook and/or Instagram as the social channels.
- Enter promotional content, including event details
- Upload an image from your device or select from the act gallery.
- Click Schedule to publish the post or set it for a future time.
- For more information on publishing your gigs to Facebook and Instagram, visit this support article.
Need Additional Support?
If you need any further assistance, please contact us at support@hotgiggity.com.